I have so much catching up to do with Modern Vintage Cooking that it's hard to know where to start. Computer issues have consistently kept me from posting new recipes - first with my computer's memory, then with uploading the photos, and finally Blogger editing issues - but the good news is that I have lots of recipes saved up to post.
While it's not difficult to find instructions online about how to make your own peanut butter, I feel like the magic of homemade peanut butter too often gets lost in discussions of the mechanics. And homemade peanut butter is magical - it's cheap, quick and easy to make, utterly delicious, and better than any variety you can buy at the grocery store.
I grew up eating crunchy peanut butter from the grocery store and thought it was pretty good. I never really thought about making my own to use in peanut butter and jelly sandwiches or to enjoy next to a sliced banana. I also never realized just how easy it is to make homemade peanut butter or how amazing it tastes in comparison to processed peanut butter. It's a whole new world.
If you're new to making your own nut butters, peanut butter is a great place to start because you don't need to add anything to the peanuts if you don't want to. I've experimented with different amounts of salt and seasonings and have my own preferences that I detail below, but you can also just put peanuts in your food processor and end up with peanut butter in the end. You can't really mess it up.
Start using your homemade peanut butter on sandwiches, in smoothies, on cereal, and in desserts, and you will discover the magic that is super fresh, homemade peanut butter. Friends will wonder why your peanut butter cookies taste so good, your kids will request extra peanut butter on their sandwiches, and you might even find yourself opening up the jar of peanut butter armed with only a spoon and a taste for something homemade.
Showing posts with label dessert. Show all posts
Pear Apple Oat Crisp
Is this breakfast or dessert? You decide. I've been loving the local apples and pears at the farmer's market during the past month and have been experimenting with roasting and baking them. I've completely fallen for this crisp recipe and have been known to eat it at any time of the day. If your local orchard sells "seconds," grab them and make this recipe.
For dessert, you can serve the crisp warm with a scoop of vanilla ice cream or gelato. Or make up some cold "yogurt cream" like I do by blending yogurt, ice, a handful of cashews, and fruit (fresh, frozen, dried - your choice!) in the blender until smooth. Then pour the cold "cream" over the top of your crisp and let the oats soak up the liquid. Top with some chopped toasted walnuts, and the texture is just about perfect.
I've tested this crisp recipe using lots of different variations, but my favorite version has a combination of apples and pears with a good helping of dried cranberries mixed in. I was also pleasantly surprised with the version where I added some baked sweet potato in place of some of the apple and pear. The sweet potato is soft and creamy and added an almost pumpkin-like flavor and texture to the dish without making it mushy.
I'm usually pretty strict about my breakfast routine during the week - a smoothie made with fresh greens, carrots, ginger, flaxmeal, and whatever fresh or frozen fruit we have in the refrigerator - but this dish is such a lovely breakfast treat on the weekends. Since I prefer cold "cereal" for breakfast, leftovers are my favorite way to eat this in the morning.
For dessert, you can serve the crisp warm with a scoop of vanilla ice cream or gelato. Or make up some cold "yogurt cream" like I do by blending yogurt, ice, a handful of cashews, and fruit (fresh, frozen, dried - your choice!) in the blender until smooth. Then pour the cold "cream" over the top of your crisp and let the oats soak up the liquid. Top with some chopped toasted walnuts, and the texture is just about perfect.
Day 7 - Cleansing Spree and Ginger Carrot Rice Pudding
Day 7 on the Goop Cleanse Elimination Diet - Including no dairy, eggs, tomatoes, bananas, corn, red meat, pork, gluten, soy, sugar, coffee, or alcohol.
I think the Cleanse is finally getting to me. I woke up this morning with the extreme urge to clean my entire apartment and rearrange the furniture. If you knew me well, you would realize that this is not normal behavior. At all. I am not a messy person per se, but I am certainly not the type of person who wakes up and starts cleaning the apartment and rearranging furniture at 7:45am. That just doesn't happen. But it happened today, and it felt great. The cleansing process has been surprisingly therapeutic and has encouraged me to reevaluate many aspects of my life. Today I was reevaluating which way my dining room table should face and where to put my
Cleansing is about taking control of the things that you have the power to change and then letting the rest go. Eating is all about control, and when you control what you eat with the intention of making your body feel as good as possible, it has an effect on how you approach the rest of your life. So many things are out of your control in the world, but your food and living space are two things that you do have the power to manage.
As I looked around my apartment, which I had thought was fairly clean when I wasn't looking at it too closely, I realized that I had let certain things pile up around the house and allowed some dust to accumulate. Out of habit I ignored these things that were really making my everyday life worse in the long run. However, while clutter and dirt are easily fixed with a day or two of thorough cleaning, our eating habits are a bit more complex.
It's so much harder to see the "clutter" in our eating habits - extra food that we eat that doesn't benefit us, yet we can't seem to cut it out. The toughest part about food "clutter" is that until you strip down your diet, it can be difficult to identify what is the clutter and what is the good stuff. Fruits and vegetables are obvious good stuff, but what about those processed protein bars that you eat? They're supposed to be "healthy," and yet they contain a million different ingredients and probably a bit too much processed sugar. Is that clutter, or is that still good stuff?
I can already foresee a million questions that I'll be forced to answer after I finish the 21days of cleansing. What foods will I reintroduce first? How many of the excluded foods do I want to put back in the rotation? Do I really need to start drinking coffee in the morning again? I can't say for sure what my answers will be to these questions, but I know they will involve a bit of self-reflection, and that's the important part.
For now, I will post another "clean" recipe - Ginger Carrot Rice Pudding. This version puts a healthy spin on a traditional dessert, turning it into a dish that can be eaten at any point during the day when you want something slightly sweet. I used short grain brown rice, but you can experiment with other types of rice or even other grains like quinoa or millet, which would substantially cut down the cooking time (no need to pre-boil, just rinse the grains and add to the ginger carrot mixture)
Vegan Chocolate Red Wine Cake
I made a few "green edits" to the cake and added red wine and cinnamon for a deep cold-weather flavor combination.
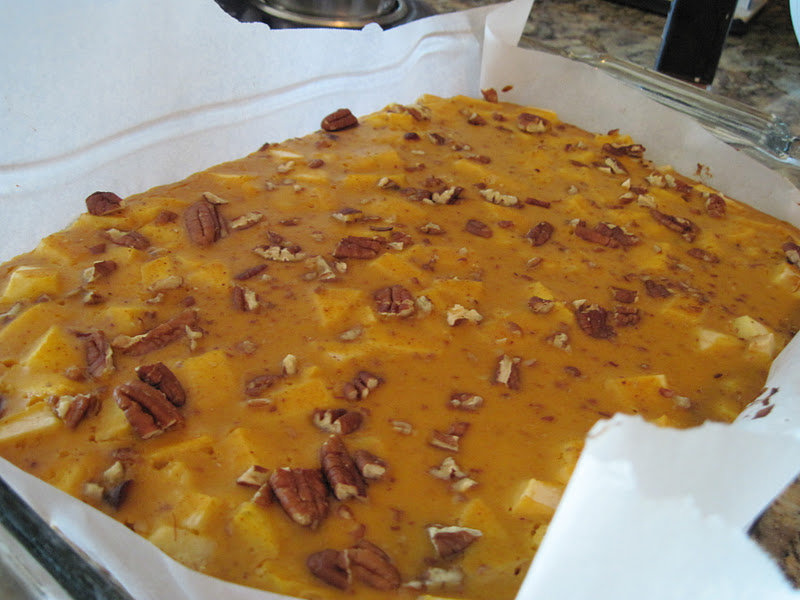
Green Edit: Pumpkin Apple Cranberry Bars
I hope you all had a wonderful Thanksgiving holiday and enjoyed many delicious dishes at your family feasts. With the Christmas season already underway, I want to share a dessert recipe that I developed for Thanksgiving dinner that could easily work its way into your holiday baking this year.
I am a sucker for pumpkin pie (and used to think that no Thanksgiving was complete without one), but I dared to be different this year and decided make some pumpkin bars that could theoretically feed a bigger crowd than a standard pie. This recipe makes at least 16 bars, while a pumpkin pie generally yields 8 servings.
I used this recipe as an opportunity to test out a new format for the blog that allows you to easily see the process that I go through when I edit a recipe. I call them "Green Edits" - the green text indicates my suggestions for lowering the fat, calories, and sugar in the recipe while maintaining the flavor integrity of the dish.
While there isn't anything inherently wrong with the original recipe, and you can certainly feel free to disregard my changes, I think it's helpful to know what changes you can make to a recipe and still have it "turn out." These Pumpkin Apple Cranberry Bars are still dessert - they're just a little bit better for you and can be enjoyed with less guilt than a traditional holiday dessert.
Chocolate Chip Peanut Butter Bars
I have been meaning to make a new version of my Chocolate Fudge Walnut Brownies since I posted the original recipe back in May. I thought about a Chocolate Raspberry Brownie, or a Chocolate Cream Cheese Brownie, but I decided that what I really wanted was a bar that combined two of my favorite ingredients: chocolate and peanut butter. (I even decided to make my own peanut butter for these bars, which only added an extra couple minutes to the process and produced delicious leftover peanut butter for sandwiches)
These bars are pretty radical, but you'll have to trust me that the end result is delicious. The secret ingredients in these are garbanzo beans (cooked chickpeas) and butternut squash. The garbanzo beans allow this dessert to be a gluten-free treat (as long as your oats are labeled gluten-free), and the butternut squash purée substitutes for butter or oil. These bars are also dairy free, though they aren't vegan because they contain two eggs.
The result is a moist, fudgy peanut butter bar with bites of chocolate chips within the batter and a crunchy peanut and chocolate chip topping. You don't have to tell anyone how healthy they are, at least not before they try one (or two).
These bars are pretty radical, but you'll have to trust me that the end result is delicious. The secret ingredients in these are garbanzo beans (cooked chickpeas) and butternut squash. The garbanzo beans allow this dessert to be a gluten-free treat (as long as your oats are labeled gluten-free), and the butternut squash purée substitutes for butter or oil. These bars are also dairy free, though they aren't vegan because they contain two eggs.
The result is a moist, fudgy peanut butter bar with bites of chocolate chips within the batter and a crunchy peanut and chocolate chip topping. You don't have to tell anyone how healthy they are, at least not before they try one (or two).
Pumpkin Apple Cranberry Harvest Granola
Happy Food Day! I'm excited about the first Food Day and have decided to post one of my new favorite healthy fall recipes to celebrate. Are you getting sick of pumpkin yet? I'm not and will likely post a few more pumpkin-themed recipes before the snow starts to fall, if that ever happens in DC.
I've been working on this pumpkin granola recipe since they started carrying canned pumpkin at the grocery store. It's a super easy recipe using canned pumpkin purée along with fresh apple purée, maple syrup, cinnamon, and nutmeg, which infuse the granola with all the best fall flavors. You can use fresh pumpkin purée if you have it, but canned pumpkin makes the whole process really quick. I use a combination of walnuts, almonds, and cashews because they're some of my favorite nuts, but you can adjust the combination depending on your taste.
To make a really hearty breakfast with this granola, add some cooked bulgur and/or quinoa to a bowl, pour in enough milk to soak the grains, and top the mixture with plain Greek yogurt, chopped apples, a dollop of pumpkin butter, apple butter, or sweet potato butter, a sprinkle Pumpkin Apple Harvest Granola, and a dash of cinnamon. It's a delicious way to start the day and keeps me full even through a morning workout.
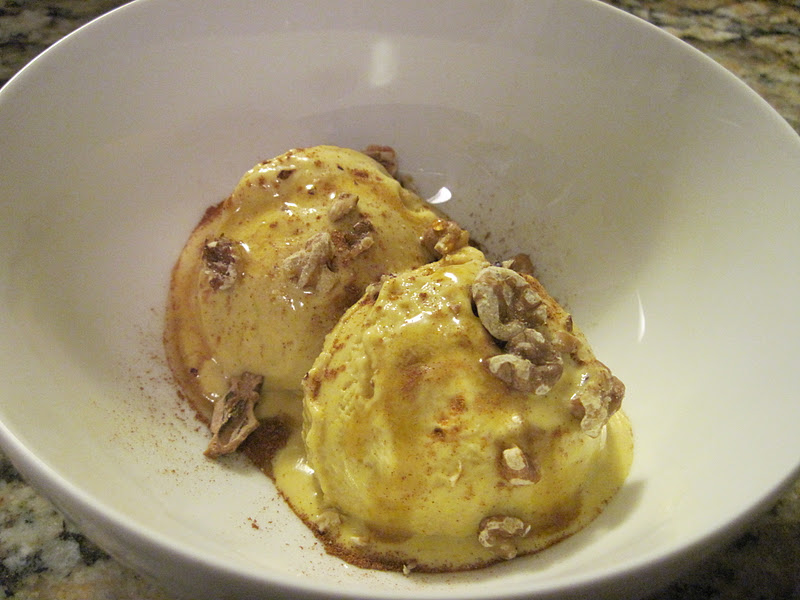
Granola also makes a great topping for ice cream and desserts (I've been enjoying it on top of homemade pumpkin frozen yogurt lately), or you can eat it on it's own with some cold milk poured on top.
Unlike most granola recipes, this recipe contains no oil. It also contains substantially less sugar than most granolas - using puréed apple and maple syrup to naturally sweeten the granola instead of refined sugar.
I've been working on this pumpkin granola recipe since they started carrying canned pumpkin at the grocery store. It's a super easy recipe using canned pumpkin purée along with fresh apple purée, maple syrup, cinnamon, and nutmeg, which infuse the granola with all the best fall flavors. You can use fresh pumpkin purée if you have it, but canned pumpkin makes the whole process really quick. I use a combination of walnuts, almonds, and cashews because they're some of my favorite nuts, but you can adjust the combination depending on your taste.
To make a really hearty breakfast with this granola, add some cooked bulgur and/or quinoa to a bowl, pour in enough milk to soak the grains, and top the mixture with plain Greek yogurt, chopped apples, a dollop of pumpkin butter, apple butter, or sweet potato butter, a sprinkle Pumpkin Apple Harvest Granola, and a dash of cinnamon. It's a delicious way to start the day and keeps me full even through a morning workout.
Granola also makes a great topping for ice cream and desserts (I've been enjoying it on top of homemade pumpkin frozen yogurt lately), or you can eat it on it's own with some cold milk poured on top.
Unlike most granola recipes, this recipe contains no oil. It also contains substantially less sugar than most granolas - using puréed apple and maple syrup to naturally sweeten the granola instead of refined sugar.
Pumpkin Apple Walnut Bread
As I think more about fall traditions and the first holiday of the season, Halloween, I begin to realize how crazy our American Halloween traditions are. Most people go out and buy pumpkins for Halloween, which they either carve or set out on the porch as decoration, but almost no one knows how to cook one. I imagine that thousands of pumpkins end up in the trash every year after being cut up to create some silly toothless face. And then on Halloween, with all the nutritious squash lit up around the neighborhood, kids walk from door to door filling up pillow sacks with sugary processed candy. Does that seem a little odd to anyone else?
I may sound like a bit of curmudgeon with this rant, and I admit that I have carved my fair share of pumpkins and eaten plenty of Halloween candy (used to love those Mr. Goodbar minis), but the point I want to make is that pumpkins are food. If you're not going to cook up your Halloween pumpkins to make your Thanksgiving pumpkin pies instead of buying a can of pre-made pumpkin pie mix and a pre-made crust from the grocery store, at least roast the seeds from the pumpkin when you carve it out to make a jack-o-lantern. They're so good with a little bit of salt and pumpkin pie spice. And if you're feeling a little more adventurous and a little less wasteful, try cooking a pumpkin in the oven and making a loaf of this Pumpkin Apple Walnut Bread or the Pumpkin Bread with Banana and Walnuts.
So while I'm generally not one for repeat posts, I decided to buy yet another pumpkin this week and combine it with some of the amazing apples that are available right now (my favorites are the Ginger Gold). I added one cored apple, peel and all, into the blender mixture, and then peeled, cored, and chopped another apple to add to the batter with the walnuts.
Fresh Pumpkin Bread with Banana & Walnuts
When we were in Paris last week, the weather was the perfect Fall temperature (just cold enough to wear a light jacket and Parisian-style scarf), but pumpkin-flavored goodies were nowhere to be found. No Pumpkin Spice Lattes at Starbucks. No pumpkin muffins or pumpkin bread at the bakeries. Now I'm certainly not complaining about being in Paris for the beginning of Fall, but as soon as we arrived back in the States, I was ready for some pumpkin.
I kept an eye out for it at the grocery store and even asked someone at Whole Foods whether they carry canned pumpkin (they do, but it hadn't come in yet), but I couldn't seem to get my hands on a can. In a moment of desperation, I bought a cute little pumpkin and decided to roast it myself.
The process of cooking a fresh pumpkin was surprisingly easy. Since it was small enough (just about 4 or 5 inches in diameter), it wasn't hard to cut it in half with a sharp knife. I just scooped out the seeds, which I later toasted, and wrapped the little guy up in aluminum foil to roast while I was roasting squash for the Butternut Squash Soup (35 minutes at 425 degrees). Then, I just scooped out the cooked flesh and refrigerated it until I was ready to make this bread.
This bread is made without any added oil because the pumpkin and banana add enough moisture to the bread. Each slice has a chewy crust and moist center.
I kept an eye out for it at the grocery store and even asked someone at Whole Foods whether they carry canned pumpkin (they do, but it hadn't come in yet), but I couldn't seem to get my hands on a can. In a moment of desperation, I bought a cute little pumpkin and decided to roast it myself.
The process of cooking a fresh pumpkin was surprisingly easy. Since it was small enough (just about 4 or 5 inches in diameter), it wasn't hard to cut it in half with a sharp knife. I just scooped out the seeds, which I later toasted, and wrapped the little guy up in aluminum foil to roast while I was roasting squash for the Butternut Squash Soup (35 minutes at 425 degrees). Then, I just scooped out the cooked flesh and refrigerated it until I was ready to make this bread.
This bread is made without any added oil because the pumpkin and banana add enough moisture to the bread. Each slice has a chewy crust and moist center.
Vegan Dark Chocolate Peanut Butter Ice Cream
I've been experimenting with different ice cream recipes this summer, which basically means that we've been eating a lot of homemade ice cream, and this recipe has easily become the favorite. With the addition of an extra banana and even more cocoa powder, this ice cream has a richer flavor than the Chocolate Amaretto Ice Cream but is made exactly the same way.
I highly recommend investing in a small container of Valrhona cocoa powder to make this and other chocolate desserts that use unsweetened cocoa powder (try it in the Vegan Iced Mocha). It really makes a huge difference. I bought some for the first time at Whole Foods a couple weeks ago and I don't think I'm going to be able to go back to generic cocoa powder. Ghiradelli cocoa powder
is pretty good too, and you can get a good deal on it at Target. Whatever you do, don't buy Hershey's cocoa powder. I tried it once and it had almost a chalky flavor to it (not a good characteristic for chocolate).
I have also included a very basic recipe for Chocolate-covered Nuts that you can use to make a homemade version of those delicious chocolate-covered nuts that they sell in bins at Trader Joe's. They only take a couple minutes to make, and you can actually make them while your ice cream is freezing. These are cheaper to make than the store-bought version and taste substantially fresher as well. Toasting the nuts first really adds depth of flavor.
Dark Chocolate Peanut Butter Ice Cream (Makes 2 servings)
2 medium ripe bananas, broken into about 3 pieces each
1/2 cup almond milk (soy or regular milk would work)
2 Tablespoons unsweetened cocoa powder (preferably Valrhona)
1 Tablespoon natural peanut butter or almond butter (I use unsalted crunchy versions of both)
1/2 teaspoon vanilla extract
1 teaspoon instant coffee
1/4 teaspoon cinnamon
(See more detailed instructions on making and freezing ice cream)
Combine all of the ingredients in a blender and blend at the highest speed for about one minute until the mixture is smooth.
Pour mixture into an ice cream maker
or the ice cream bowl attachment for the Kitchenaid mixer
. Freeze according to the machine's instructions, or for about 10 minutes in the Kitchenaid attachment (which is what I use).
If you want chocolate-covered nuts in the ice cream (or any other toppings), drop them in during the last minute or so that the ice cream is being processed in the machine or bowl.
Chocolate-covered Cashews or Peanuts
Handful of chocolate chips
Handful of toasted cashews or dry roasted peanuts, unsalted or lightly salted
Place the chocolate chips in a microwave-safe bowl. Heat for 20-second intervals, stirring well in between the intervals. It should take between 3 and 5 intervals to melt the chocolate chips completely depending on the amount of chocolate chips and your microwave. Stir with a rubber spatula until the chocolate is smooth.
Add a small amount of the nuts to the melted chocolate and stir to coat the nuts completely in chocolate. Some will stick together in clusters, but that's OK. Add additional nuts to the melted chocolate until all the nuts are coated and there isn't very much melted chocolate remaining in the bowl. (Just remember that it's much easier to add additional nuts to the mixture than it is to add additional chocolate).
Transfer the coated nuts to a piece of parchment paper on a baking pan or in a casserole dish (whatever will fit in your freezer at the moment). Spread the nuts in an even layer on the parchment paper, and place the pan or dish in the freezer for at least 5 minutes, until the chocolate sets.
The nuts will be ready to go in the ice cream (or used as a topping) after about 5 minutes in the freezer, but you can keep them in there for longer (transfer to an airtight container for longer-term storage). I like to keep these in the freezer indefinitely because I'm less likely to eat them all at once if they're out of sight. You can keep them in the refrigerator as well, or on the counter in an airtight container if your kitchen is cool enough that they won't be in danger of melting.
The following nutrition facts are for one serving of ice cream made with natural crunchy peanut butter, before adding any chocolate-covered nuts:
I highly recommend investing in a small container of Valrhona cocoa powder to make this and other chocolate desserts that use unsweetened cocoa powder (try it in the Vegan Iced Mocha). It really makes a huge difference. I bought some for the first time at Whole Foods a couple weeks ago and I don't think I'm going to be able to go back to generic cocoa powder. Ghiradelli cocoa powder
I have also included a very basic recipe for Chocolate-covered Nuts that you can use to make a homemade version of those delicious chocolate-covered nuts that they sell in bins at Trader Joe's. They only take a couple minutes to make, and you can actually make them while your ice cream is freezing. These are cheaper to make than the store-bought version and taste substantially fresher as well. Toasting the nuts first really adds depth of flavor.
Dark Chocolate Peanut Butter Ice Cream (Makes 2 servings)
2 medium ripe bananas, broken into about 3 pieces each
1/2 cup almond milk (soy or regular milk would work)
2 Tablespoons unsweetened cocoa powder (preferably Valrhona)
1 Tablespoon natural peanut butter or almond butter (I use unsalted crunchy versions of both)
1/2 teaspoon vanilla extract
1 teaspoon instant coffee
1/4 teaspoon cinnamon
(See more detailed instructions on making and freezing ice cream)
Combine all of the ingredients in a blender and blend at the highest speed for about one minute until the mixture is smooth.
Pour mixture into an ice cream maker
If you want chocolate-covered nuts in the ice cream (or any other toppings), drop them in during the last minute or so that the ice cream is being processed in the machine or bowl.
Chocolate-covered Cashews or Peanuts
Handful of chocolate chips
Handful of toasted cashews or dry roasted peanuts, unsalted or lightly salted
Place the chocolate chips in a microwave-safe bowl. Heat for 20-second intervals, stirring well in between the intervals. It should take between 3 and 5 intervals to melt the chocolate chips completely depending on the amount of chocolate chips and your microwave. Stir with a rubber spatula until the chocolate is smooth.
Add a small amount of the nuts to the melted chocolate and stir to coat the nuts completely in chocolate. Some will stick together in clusters, but that's OK. Add additional nuts to the melted chocolate until all the nuts are coated and there isn't very much melted chocolate remaining in the bowl. (Just remember that it's much easier to add additional nuts to the mixture than it is to add additional chocolate).
Transfer the coated nuts to a piece of parchment paper on a baking pan or in a casserole dish (whatever will fit in your freezer at the moment). Spread the nuts in an even layer on the parchment paper, and place the pan or dish in the freezer for at least 5 minutes, until the chocolate sets.
The nuts will be ready to go in the ice cream (or used as a topping) after about 5 minutes in the freezer, but you can keep them in there for longer (transfer to an airtight container for longer-term storage). I like to keep these in the freezer indefinitely because I'm less likely to eat them all at once if they're out of sight. You can keep them in the refrigerator as well, or on the counter in an airtight container if your kitchen is cool enough that they won't be in danger of melting.
The following nutrition facts are for one serving of ice cream made with natural crunchy peanut butter, before adding any chocolate-covered nuts:
| Nutrition Facts | ||||||
Serving Size 193 g | ||||||
Amount Per Serving | ||||||
Calories 187 Calories from Fat 50 | ||||||
% Daily Value* | ||||||
Total Fat 5.5g 8% | ||||||
Saturated Fat 1.3g 7% | ||||||
Cholesterol 0mg 0% | ||||||
Sodium 40mg 2% | ||||||
Total Carbohydrates 33.8g 11% | ||||||
Dietary Fiber 5.4g 21% | ||||||
Sugars 16.6g | ||||||
Protein 4.9g | ||||||
|
Cherry Custard Pie
This pie is based on a variation of the Apple Custard Pie Recipe in Mollie Katzen's Moosewood Cookbook. I love the fresh cherries that are available this time of year, but if you can't get cherries or want to try a different fruit, you can also make this pie with Granny Smith apples or peaches. I have to admit that I really wished I had a cherry pitter when I was making this!
I added chopped almonds to the top of the pie because I think they go really well with cherries, but you can add walnuts or omit the nuts altogether.
Dark Chocolate Almond Meringue Cookies
We had friends over for dinner on Friday night, which gave me the perfect excuse to try a new dessert recipe. I try not to get myself involved in "projects" like making meringue cookies unless I have someone coming over to help me eat them.
Meringues are the gelato of the cookie family - they're a little lighter than most cookies and they pack really intense flavor. You really taste a nice dark chocolate flavor when you bite into these, and while you'll certainly be tempted to eat more than one, a couple of these cookies really hit the spot after dinner. The recipe contains a decent amount of sugar, but I've read that the sugar is necessary to give the meringues their crisp texture. Plus, the recipe makes 40 cookies, so even with the sugar, each cookie is less than 20 calories.
I'm sure you can make lovely vanilla meringues, but I went for the dark chocolate version. I also added some finely chopped almonds to the batter for some extra crunch and flavor. You can really experiment with different flavorings in these and might want to give toasted peanuts or hazelnuts a try. Or you can leave out the chocolate all together (not completely sacrilegious) and add some lemon zest to make lemon meringue cookies. It's really up to you.
I would love to make these my new Christmas cookie to give away around the holidays. They stay fresh longer than most cookies, and you can experiment endlessly with different flavors. I've even seen recipes for peppermint meringue cookies...
This recipe is based on the Chocolate Meringue Cookie recipe in the Moosewood Restaurant Book of Desserts
, which has lots of great dessert recipes in it. I particularly love the "Guiltless Low-fat Treats" list at the back of the book - this recipe is one of those.
Dark Chocolate Almond Meringue Cookies (Makes approximately 40 cookies)
1/3 cup unsweetened cocoa powder (get Ghiradelli or another good brand- it does make a difference)
3 Tablespoons cornstarch
3 egg whites, at room temperature*
1/4 teaspoon salt
1/4 teaspoon cream of tartar
3/4 cup powdered sugar or superfine sugar
1 teaspoon vanilla extract
1/3 cup almonds, finely chopped (toasted if you like)
*You can get the egg whites to room temperature a couple different ways. The first is to separate the eggs and leave the egg whites out on the counter until they're room temperature. The other way is to put the uncracked eggs in a bowl of warm water for 5 minutes to bring them to room temperature and then carefully separate the whites from the yolks. Store the yolks covered in the refrigerator for another use. They're great to brush on homemade breads before they go in the oven.
Preheat the oven to 250 degrees. Line 2 large baking sheets with parchment paper.
1. Sift together the cocoa and cornstarch into a small bowl and set aside.
2. Add the egg whites, salt, and cream of tarter to the bowl of your mixer. Use the whisk attachment to beat the egg whites at medium speed until foamy. With the mixer running on low speed (so you don't end up with powdered sugar all over yourself), gradually add the powdered sugar 1 tablespoon at a time. Continue to beat for at least 3 minutes until the mixture is thick, glossy, and forms stiff peaks. Beat in the vanilla extract.
3. Add the cocoa mixture and the chopped nuts to the top of the egg white mixture.
4. Gently fold in the cocoa mixture and nuts until the mixture is mostly combined. It's OK if your batter looks marbled, you just don't want to over-mix and deflate your egg whites.
5. You can transfer your batter to a plastic bag and cut the corner to make an impromptu pastry bag.
Or, you can just use a teaspoon to drop small dollops of the batter on the prepared baking sheets. Either way, you'll want small teaspoon-sized dollops spaced about an inch apart on your baking sheet.
6. Bake for 1.5 hours at 250 degrees. When the cookies are finished baking, turn the oven off but don't open it. Leave the baked cookies in the oven for a few hours, or overnight if you're making them in the evening.
The cookies should be crunchy when you bite into them, but the flavor will melt in your mouth. Store the cookies in an airtight container at room temperature. They'll stay fresh longer than they'll survive.
Here are the nutrition facts for one cookie, assuming you get about 40 small cookies. If you're anything like me and C, you won't be able to just eat one.
Meringues are the gelato of the cookie family - they're a little lighter than most cookies and they pack really intense flavor. You really taste a nice dark chocolate flavor when you bite into these, and while you'll certainly be tempted to eat more than one, a couple of these cookies really hit the spot after dinner. The recipe contains a decent amount of sugar, but I've read that the sugar is necessary to give the meringues their crisp texture. Plus, the recipe makes 40 cookies, so even with the sugar, each cookie is less than 20 calories.
I'm sure you can make lovely vanilla meringues, but I went for the dark chocolate version. I also added some finely chopped almonds to the batter for some extra crunch and flavor. You can really experiment with different flavorings in these and might want to give toasted peanuts or hazelnuts a try. Or you can leave out the chocolate all together (not completely sacrilegious) and add some lemon zest to make lemon meringue cookies. It's really up to you.
I would love to make these my new Christmas cookie to give away around the holidays. They stay fresh longer than most cookies, and you can experiment endlessly with different flavors. I've even seen recipes for peppermint meringue cookies...
This recipe is based on the Chocolate Meringue Cookie recipe in the Moosewood Restaurant Book of Desserts
Dark Chocolate Almond Meringue Cookies (Makes approximately 40 cookies)
1/3 cup unsweetened cocoa powder (get Ghiradelli or another good brand- it does make a difference)
3 Tablespoons cornstarch
3 egg whites, at room temperature*
1/4 teaspoon salt
1/4 teaspoon cream of tartar
3/4 cup powdered sugar or superfine sugar
1 teaspoon vanilla extract
1/3 cup almonds, finely chopped (toasted if you like)
*You can get the egg whites to room temperature a couple different ways. The first is to separate the eggs and leave the egg whites out on the counter until they're room temperature. The other way is to put the uncracked eggs in a bowl of warm water for 5 minutes to bring them to room temperature and then carefully separate the whites from the yolks. Store the yolks covered in the refrigerator for another use. They're great to brush on homemade breads before they go in the oven.
Preheat the oven to 250 degrees. Line 2 large baking sheets with parchment paper.
1. Sift together the cocoa and cornstarch into a small bowl and set aside.
2. Add the egg whites, salt, and cream of tarter to the bowl of your mixer. Use the whisk attachment to beat the egg whites at medium speed until foamy. With the mixer running on low speed (so you don't end up with powdered sugar all over yourself), gradually add the powdered sugar 1 tablespoon at a time. Continue to beat for at least 3 minutes until the mixture is thick, glossy, and forms stiff peaks. Beat in the vanilla extract.
3. Add the cocoa mixture and the chopped nuts to the top of the egg white mixture.
4. Gently fold in the cocoa mixture and nuts until the mixture is mostly combined. It's OK if your batter looks marbled, you just don't want to over-mix and deflate your egg whites.
5. You can transfer your batter to a plastic bag and cut the corner to make an impromptu pastry bag.
Or, you can just use a teaspoon to drop small dollops of the batter on the prepared baking sheets. Either way, you'll want small teaspoon-sized dollops spaced about an inch apart on your baking sheet.
6. Bake for 1.5 hours at 250 degrees. When the cookies are finished baking, turn the oven off but don't open it. Leave the baked cookies in the oven for a few hours, or overnight if you're making them in the evening.
The cookies should be crunchy when you bite into them, but the flavor will melt in your mouth. Store the cookies in an airtight container at room temperature. They'll stay fresh longer than they'll survive.
Here are the nutrition facts for one cookie, assuming you get about 40 small cookies. If you're anything like me and C, you won't be able to just eat one.
| Nutrition Facts | ||||||
Serving Size 7 g | ||||||
Amount Per Serving | ||||||
Calories 19 Calories from Fat 4 | ||||||
% Daily Value* | ||||||
Total Fat 0.5g 1% | ||||||
Trans Fat 0.0g | ||||||
Cholesterol 0mg 0% | ||||||
Sodium 20mg 1% | ||||||
Total Carbohydrates 3.4g 1% | ||||||
Sugars 2.3g | ||||||
Protein 0.6g | ||||||
|
Summer Fruit Crostata with Sweet Potato Pastry Crust
I remember the first time that I made homemade pie crust. I was bound and determined to make Ina Garten's Deep Dish Apple Pie Recipe. I wasn't sure exactly why I wanted to make homemade apple pie so much, because, to be honest, apple pie was never my favorite, but something about the challenge of making such a classic dish from scratch appealed to me. Until that point, I had never actually eaten an apple pie made entirely from scratch, which probably explains why I never enjoyed the slices I was exposed to through the years.
Can you buy a good ready-made pie crust? Perhaps you can, but your answer really depends on what your expectations are. There's really no substitute for a homemade pie crust in my mind. A Pillsbury crust will never be better than fresh ingredients being rolled out with a rolling pin on someone's kitchen counter.
When my first homemade apple pie came out of the oven, with its perfectly browned crust and bubbly filling, I knew that I had discovered a new realm to explore in my baking - pies. Ina's crusts are delicious, and if you follow her recipes, they will always come out tasting better than the classics you remember, but they are no doubt high in fat and calories.
Ina's Summer Fruit Crostata crust (without the fruit or the topping) has 1306 total calories, 91.7 grams of fat, and 58 grams of saturated fat, and the following nutrition facts are for each slice of just the crust:
| Nutrition Facts |
Serving Size 43 g |
Amount Per Serving |
Calories 218 Calories from Fat 137 |
% Daily Value* |
Total Fat 15.3g 23% |
Saturated Fat 9.7g 48% |
Cholesterol 40mg 13% |
Sodium 99mg 4% |
Total Carbohydrates 18.9g 6% |
Dietary Fiber 0.7g 3% |
Sugars 4.9g |
Protein 2.2g |
| Nutrition Facts | ||||||
Serving Size 222 g | ||||||
Amount Per Serving | ||||||
Calories 418 Calories from Fat 211 | ||||||
% Daily Value* | ||||||
Total Fat 23.4g 36% | ||||||
Saturated Fat 14.6g 73% | ||||||
Cholesterol 61mg 20% | ||||||
Sodium 251mg 10% | ||||||
Total Carbohydrates 51.3g 17% | ||||||
Dietary Fiber 3.3g 13% | ||||||
Sugars 29.3g | ||||||
Protein 4.2g | ||||||
|
(*Scroll to the bottom to compare the two sets of nutrition facts)
Getting 73% of your saturated fat for the day in a piece of pie makes it pretty difficult to balance out the rest of your food for the day. I knew that if I wanted to be able to eat a Summer Fruit Crostata, the recipe was going to need a makeover. I started with the crust, because that's where most of the saturated fat was hiding.
Anyone who watches Barefoot Contessa knows that Ina Garten cooks and bakes with a lot of butter. There is no doubt that butter makes pie crusts taste good. People have been testing butter-based pie crust recipes for generations. But is adding a stick of butter to the crostata crust the only way to make a crust that tastes good? My answer is "no."
I turned to the friendly sweet potato to help me out with this one. Not only are sweet potatoes, well, sweet, but they are very starchy as well and I had a feeling that it would help the dough stay together and add a good amount of fiber and vitamins to the crust. I also decided to switch completely to whole wheat flour. Why not? I never eat white bread when I make sandwiches, so why should I use white flour for a pie crust? We can all use the whole grains, so I just switched it up. Whole wheat pastry flour will give you a lighter consistency than regular whole wheat flour, and I recommend using it if you don't want your crust to be too "rustic."
This recipe will make 2 crusts, so once you put the effort in to making one of them, you'll have another one to throw in the freezer. Then you can defrost it overnight a month later and enjoy another fruit crostata with half the effort!
I also gave the crumble topping a makeover by adding some rolled oats, whole wheat flour, honey, and Earth Balance. Ok, I changed the whole thing, but it's really the same idea. And I just love toasted oatmeal topping on fruit. It's just delicious.
The fruit that you use is really up to you. I used fresh peaches and blueberries, and then threw in a handful of frozen berries that I had in the freezer, including raspberries and blackberries. I haven't made this with all frozen fruit, but I suspect that I'll give it a shot this winter. You can also make this with 3 Granny Smith apples, like Ina does with her Apple Crostata Recipe. Go with what's available and sounds good together. The summer fruit is great because the berry juices get bubbly inside the crust and make a great filling.
Summer Fruit Crostata with Sweet Potato Pastry Crust (Makes 6 servings)
Pastry Crust: **Makes 2 crostata crusts
2 cups whole wheat pastry flour (or a combination of pastry flour and regular whole wheat flour)
1/2 teaspoon salt
1/2 teaspoon cinnamon
Optional: 2 Tablespoons turbinado sugar*
1 teaspoon baking powder
2 Tablespoons cold unsalted butter, diced
2 Tablespoons cold low-fat cream cheese, diced
1 Tablespoon cold Earth Balance spread
1 cup cold mashed sweet potato**
1 egg, beaten
*I didn't add any sugar to my pastry dough because I felt that the sweet potato added just enough sweetness. If you like a sweeter crust though, add a couple tablespoons of sugar to the dry ingredients.
**To prepare your sweet potato, pierce the skin with a fork on all sides and wrap the potato in a piece of paper towel. Microwave for 10 minutes, flipping the sweet potato over halfway through. Peel the skin off when the potato is cool enough to handle, and mash the sweet potato with a fork. Refrigerate the sweet potato mash until you're ready to make your crust. Don't be tempted to add warm sweet potato to the crust because it will melt your butter and make a mess.
Fruit Filling:
1 pound firm ripe peaches
1/2 pound fresh or frozen berries (I used blueberries, raspberries, and blackberries)
1 Tablespoon whole wheat flour (regular or pastry)
1/2 tablespoon honey
Zest of one orange
2 Tablespoons freshly squeezed orange juice (about half an orange)
Crumble Topping:
3 Tablespoons old fashioned rolled oats
1 Tablespoon whole wheat flour (regular or pastry)
1 teaspoon honey or turbinado sugar
1 Tablespoon Earth Balance vegetable spread, melted
Serving option:
Greek yogurt mixed with raspberry fruit preserves, vanilla extract, and orange juice
To make the dough:
1. Combine the flour, salt, cinnamon, and baking powder in the bowl of your food processor. Pulse to combine.
2. Add the butter, cream cheese, and Earth Balance spread to the bowl and pulse until the mixture looks like coarse crumbs.
3. Add the cold sweet potato mash and pulse to incorporate. With the food processor running, add the egg through the feed tube and then pulse just until the dough comes together.
4. Transfer the dough to a well-floured board and roll into a ball. Cut the dough in half and form into 2 discs.
Place one disc in the refrigerator for about 1 hour. Wrap the other disc in plastic wrap and place in a freezer bag to store in the freezer for another time.
5. When the dough is done chilling, roll it into an 11-inch circle. It definitely doesn't need to be perfect, so don't worry about the edges. They're going to be folded up anyway, so just aim for a nice rustic shape that will fit the fruit you're using.
6. Preheat the oven to 450 degrees. Transfer your dough to a baking sheet lined with parchment.
7. Slice the peaches and place the slices in a bowl. I peeled the peaches because it only took a second, but you can decide whether you want to go through the trouble. Add the berries, flour, honey, orange zest, and orange juice, and mix to combine. Add the fruit mixture to the center of the crostata dough, leaving a 1 1/2 inch border.
8. Gently fold up the border of the pastry crust to make a pleated edge.
9. Combine the oats, flour, honey, and melted Earth balance spread for the crumble topping. Rub it with your fingers until it starts to hold together. Spread the crumble topping evenly over the fruit.
10. Bake the crostata at 450 degrees for 20-25 minutes, until the crust and the topping are golden and the fruit is tender. The fruit juices will likely be bubbling at this point. Let the crostata cool for 5 minutes, then carefully transfer the crostata to a cooling rack using one or two spatulas.
Serve warm or at room temperature.
Instead of going for whipped cream with the crostata, I decided to use Greek yogurt and mix in some orange juice, vanilla extract, and raspberry preserves to make a creamy topping. I served the yogurt on the side of the slices of crostata.
Since I broke down Ina's recipe into the crust and the finished crostata, I'll do the same with my recipe. Here are the nutrition facts for just the crust of one slice of crostata (assuming you cut it into 6 pieces):
| Nutrition Facts | ||||||
Serving Size 47 g | ||||||
Amount Per Serving | ||||||
Calories 126 Calories from Fat 36 | ||||||
% Daily Value* | ||||||
Total Fat 4.0g 6% | ||||||
Saturated Fat 2.0g 10% | ||||||
Trans Fat 0.0g | ||||||
Cholesterol 24mg 8% | ||||||
Sodium 122mg 5% | ||||||
Total Carbohydrates 19.3g 6% | ||||||
Dietary Fiber 3.2g 13% | ||||||
Sugars 1.3g | ||||||
Protein 3.1g | ||||||
|
Here are the nutrition facts for one slice of crostata after adding the fruit filling and crumble topping. The dessert high in fiber, vitamin A, and vitamin C. While each slice has 13 grams of sugar, most of the sugar is from the fruit and fruit juice. and the recipe contains only 1/3 of the sugar in the original recipe. The biggest change is in the saturated fat content - 14.6 grams in each slice of the original recipe, and only 2.6 grams in this recipe.
| Nutrition Facts | ||||||
Serving Size 176 g | ||||||
Amount Per Serving | ||||||
Calories 225 Calories from Fat 58 | ||||||
% Daily Value* | ||||||
Total Fat 6.4g 10% | ||||||
Saturated Fat 2.6g 13% | ||||||
Trans Fat 0.0g | ||||||
Cholesterol 24mg 8% | ||||||
Sodium 143mg 6% | ||||||
Total Carbohydrates 38.4g 13% | ||||||
Dietary Fiber 6.4g 26% | ||||||
Sugars 13.6g | ||||||
Protein 5.0g | ||||||
|
Subscribe to:
Posts (Atom)